Showing posts with label tutorial art. Show all posts

Tuesday, October 21, 2008

The Weekly Tut - Better late than never!!

I've had the most manic few days and life in general is really holding me back from what I love best - art. What can you do? I think the tuts are a great way to claim back that art time! ;)*
***************************************************************
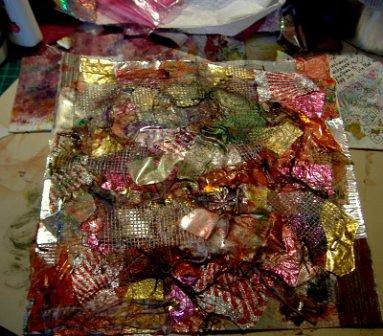
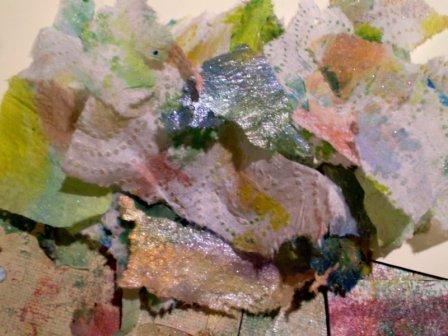
I'm pretty sure you have all heard of Bernie Berlin's Atc workshop - that book is a pure joy to read, lots of eye candy to salivate over too. This week, I am revisiting a favourite technique taken from the said book - Paint on Paper towel. Not such an exciting name now, but this is a really fun and random way of building colour, shimmer and texture into your project whether it be postcards, chunky pages, atcs's, rolo's - whatever!
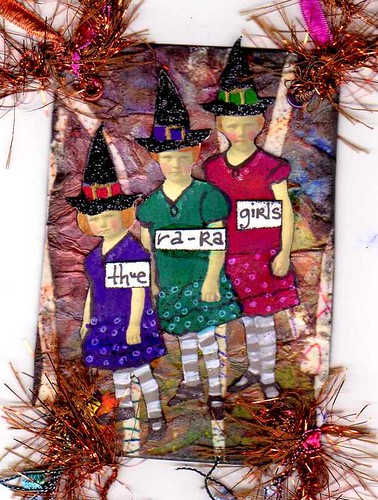
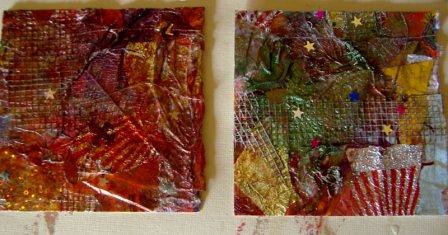
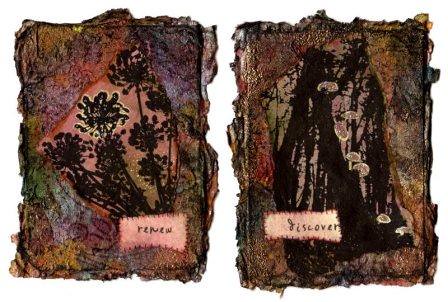
Here's a couple of atc's I've made using the said technique....
******************************************************************
You will need,
  • paper Towel/Kitchen Roll - any & all types is great
  • Pearlescent Paints - lumiere is great
  • Gel Medium
  • Wet Glue - Elmers Glue-all is tidy stuff
  • Babywipes
  • atc/rolo/chunky blanks
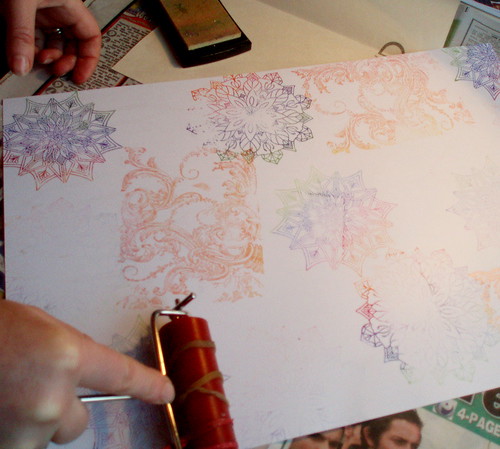
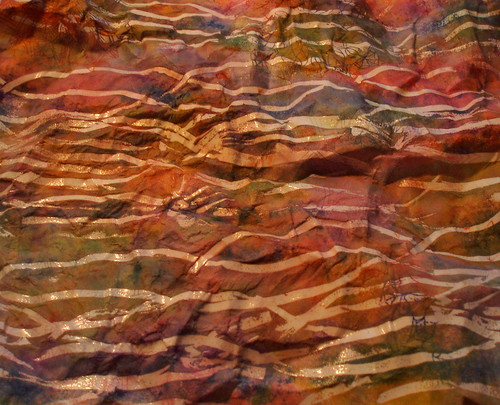
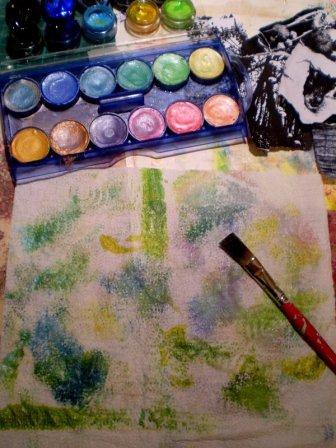
      1. To begin, pull out a couple of sheets of paper towel, I didn't have the rough grainy stuff 'a la Bernie' so I used my 'oh so fancy' two ply with circular dots. {...dots are circles Tanya}
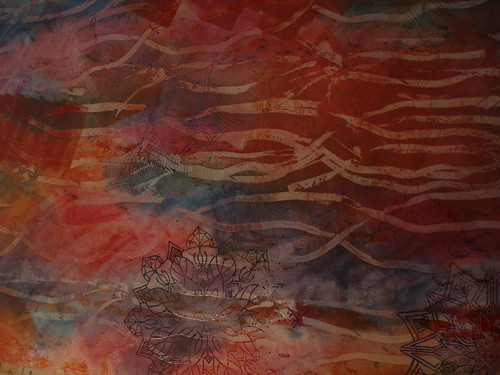
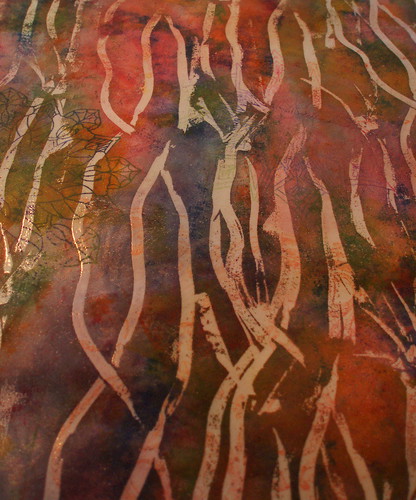
      2. Now apply your pearly paint using a dampened brush, if its too wet it'll break down the texture in your paper. I alternate from warm to cool shades, lay the colours over each other and they really start to sing. When covered, let them dry for a bit - a heat gun or radiator comes in handy.
      3. Once dry, rip these up into nice chunks of shimmery goodness.You'll probably find that 'oh so fancy' comes apart in two sheets. Not to worry - you can use both! They are equally delicious in their own way.
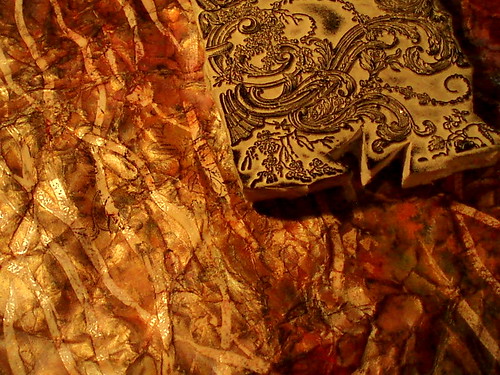
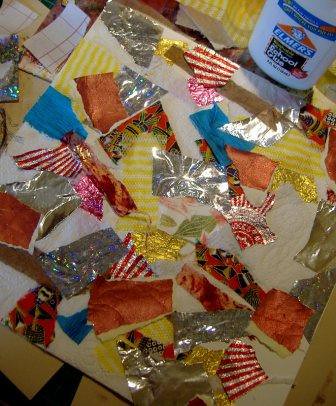
      4. Now take out your atc blanks. I place a nice fat blob of glue in the lower corner so its handy {& quick} to brush on. Start to layer the towel pieces on the card in a haphazard fashion, gluing each bit as you go.
      5. Oh look, completed blanks. But look at all those raggedy bits! Feel the love for raggedy, raggedy is good. If that rough look dosen't float your boat then simply snip them off. Its all up to you and what style you are going for.

Some Variations;
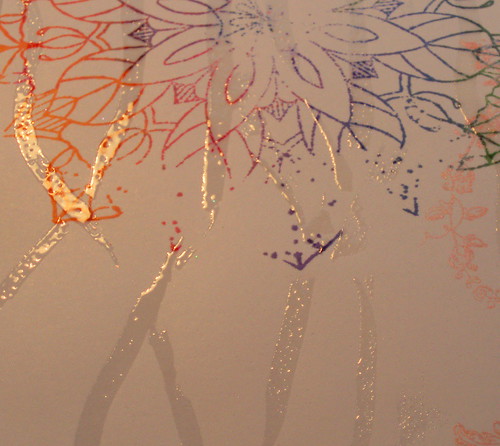
  • Overstamp with a darker dye ink
  • Sponge on pigment inks
  • Versamark and emboss the edges
  • overlay with an acetate image
  • whatever else you have in mind :)*

Sunday, October 12, 2008

The 'i should really be in bed its not actually Friday' Tut!

Well it is that time again, when I feel the need to get art mucky and make a total mess. Luckily, I'm in Gezza's house this weekend so I'm making quite a mess here instead. She has a beautiful new workshop to play in {see her flickr for pics! its gorgeous} I've had fun trying this one out and I'd love to hear from you if you give this one a go.
****************************************************
This is a great effect that you will be able to use in various ways for all your mail art, collage, card art... practically anything. Its basically a form of emboss resist {only better}, which gives a wonderful faux batik result. Here are a couple of atc's, 'Little Boo' and 'Ra-Ra', which I've made using this background technique....

***********************************************************************
You will need;
  • Large piece of off white/cream lightweight cardstock
  • Either Clear Embossing powder or UTEE
  • Versamark pad {any clear pigment ink pad is ok}
  • A Brayer {If you dont have one - then grab a rolling pin}
  • Elastic Bands or fibres
  • Inks; whatever you have, chalk & pigment best for this.
  • A couple of big swirly or geometric stamps
  • Newspaper to protect your work area
  • Babywipes
  • Lets begin by randomly stamping onto your cardstock in a few different colours, I like using my Kaleidocolours ink pads for this...
  • Wrap rubber bands or fibres {or both} around your brayer
  • Load uo your brayer with versamark and roll it up and down your sheet with wild abandon.
    • Sprinkle on the clear embossing powder and heat it up. {not too long or it will sink into your paper}
    • Rub in some chalk pigment inks, lots of colours - build it up in layers...
    • Wipe the surface with a babywipe - see what happens? :)*

    • Now take it and *cRuMPle* it all up - oh yeah baby!
      Sweep some inks over it to add depth, the ink will seek out all the breaks in the embossing and look really cool. Overstamp if you like using a darker shade. You will also be able to make out bits of your original stamping underneath the embossed lines....

      This looks amazing in blues and greens. I went for an earthy autumnal colour palette and sweeped over some metallic inks at the end. Everytime I try this technique, something new happens - thats why I love it. It really is up to you! Have a play, have a go and most of all.... get messy and have fun!!!

    Friday, October 3, 2008

    The Friday Tut >>> *Scrapheap Challenge*

    Hello Guys and Dolls, and welcome to my very first Friday Tut! Some of you will know these techniques well, and others, fingers crossed, will be new to you. I also want to learn from you in return - so comments and suggestions are very much welcome here! :)*
    **************************************************************************
    To start of this weeks tutorial, I've decided to cover one of my favourite background techniques ever - which I've lovingly called 'Scrapheap'. If you are a texture junkie like myself, then I've a pretty good feeling that you 'll like this...
    ***************************************************************************
    You will need;
    A large Watercolour/Thick Cardstock to use as a base
    PVA Glue {Lots of it!}
    Matte, Shiny & Textured Scrap Materials, such as;
    masking tape, wallpaper, sweet wrappers, kitchen towel, sellotape, j-cloth, tin foil, plasterers mesh, fibres, old postage stamps, coarse/fine glitters, patterned papers/envelopes, holographic stickers, skeleton leaves, gilding flakes, food packaging, die cuts, german scrap, fabric offcuts, sequins, tissue paper, plumbers tape etc, etc, etc..... {have a plunder, I'm sure you have a stash of bits to play with}
    Alcohol Inks
    Damp Cloth/Baby wipes
    A large protected deskspace in a well ventilated room


    ***************************************************************************

    • For this project, I decided to use three 10" by 10" pieces of watercolour board, that gives me tonnes of space to play with. Plus, we all know about the power of three, the odd is your friend.

    • Ok so now grab that stash of matte, shiny, and textured materials, and roughly tear into pieces. Then pop them into a bag, give it a swoosh to mix, and set aside. Where is your damp cloth/babywipes? You'll need them soon...

    • I like to prime my base using strips of masking tape and kitchen roll, sticking it all down sparingly with PVA. You'll be layering lots of stuff on top so don't be wasting your glue! {This provides a nice porous base for the ink to find, should there be any gaps later on}

    • Grab your stash bag and pluck out a handful, you should find a nice random mix of matte, shiny and textured bits. Stick these down with pva.

    • Keep going! Layer up until you have a lovely gaudy panel of junky scrap laid out in front of you - this won't look pretty now, we still have a little way to go....

    • Now, grab that cheap bottle of PVA and spread it evenly over the surface of your panel. If you have any of those lovely ultra fine glitters/gilding flakes/shimmery powders well now is the perfect time to sprinkle a bit of magic on top of that wet pva.

    • Leave to dry. I have absolutely no patience, so I like to do this type of thing in the evening and wake up to dry artwork. See all these amazing lustrous textures??? Now all we need is *CoLoUr*

    • This base love, love, loves alcohol ink. Splosh on a bit of whatever colours take your fancy, and see what happens - don't think about it, just relax and splosh, as much or as little as you like. {Is that window open?}


      If you don't love alcohol ink, then there are many alternatives - dry brush with metallic acrylics, drop on pearlised watercolours, sweep your brillance inkpads and wax rub-ons over the surface. For a solid colour background, you would need to spread on some gesso and apply your choice of colour acrylics on top.
      Out of the three 10" by 10" panels, I managed to get 12 amazing chunky backgrounds - and bits to spare too. This is the perfect project for anybody, I find it relaxing, inspiring and fun. I urge you to let go and get messy!
      Let me know if you do! :)*