Hello Guys and Dolls, and welcome to my very first Friday Tut! Some of you will know these techniques well, and others, fingers crossed, will be new to you. I also want to learn from you in return - so comments and suggestions are very much welcome here! :)*
**************************************************************************
To start of this weeks tutorial, I've decided to cover one of my favourite background techniques ever - which I've lovingly called 'Scrapheap'. If you are a texture junkie like myself, then I've a pretty good feeling that you 'll like this...
To start of this weeks tutorial, I've decided to cover one of my favourite background techniques ever - which I've lovingly called 'Scrapheap'. If you are a texture junkie like myself, then I've a pretty good feeling that you 'll like this...
 ***************************************************************************
You will need;
A large Watercolour/Thick Cardstock to use as a base
PVA Glue {Lots of it!}
Matte, Shiny & Textured Scrap Materials, such as;
masking tape, wallpaper, sweet wrappers, kitchen towel, sellotape, j-cloth, tin foil, plasterers mesh, fibres, old postage stamps, coarse/fine glitters, patterned papers/envelopes, holographic stickers, skeleton leaves, gilding flakes, food packaging, die cuts, german scrap, fabric offcuts, sequins, tissue paper, plumbers tape etc, etc, etc..... {have a plunder, I'm sure you have a stash of bits to play with}
Alcohol Inks
Damp Cloth/Baby wipes
A large protected deskspace in a well ventilated room
***************************************************************************
***************************************************************************
For this project, I decided to use three 10" by 10" pieces of watercolour board, that gives me tonnes of space to play with. Plus, we all know about the power of three, the odd is your friend.
Ok so now grab that stash of matte, shiny, and textured materials, and roughly tear into pieces. Then pop them into a bag, give it a swoosh to mix, and set aside. Where is your damp cloth/babywipes? You'll need them soon...
I like to prime my base using strips of masking tape and kitchen roll, sticking it all down sparingly with PVA. You'll be layering lots of stuff on top so don't be wasting your glue! {This provides a nice porous base for the ink to find, should there be any gaps later on}
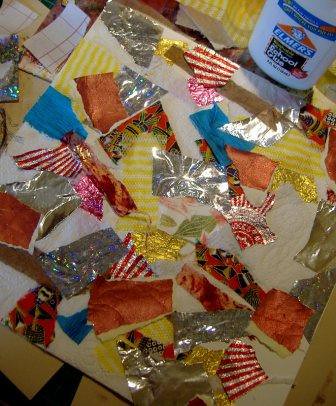
Grab your stash bag and pluck out a handful, you should find a nice random mix of matte, shiny and textured bits. Stick these down with pva.
Keep going! Layer up until you have a lovely gaudy panel of junky scrap laid out in front of you - this won't look pretty now, we still have a little way to go....
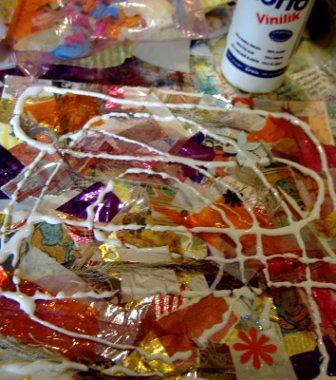
Now, grab that cheap bottle of PVA and spread it evenly over the surface of your panel. If you have any of those lovely ultra fine glitters/gilding flakes/shimmery powders well now is the perfect time to sprinkle a bit of magic on top of that wet pva.
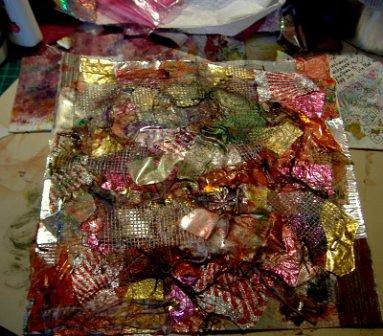
Leave to dry. I have absolutely no patience, so I like to do this type of thing in the evening and wake up to dry artwork. See all these amazing lustrous textures??? Now all we need is *CoLoUr*

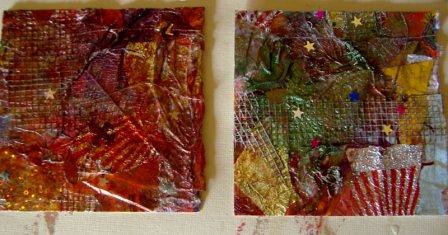
This base love, love, loves alcohol ink. Splosh on a bit of whatever colours take your fancy, and see what happens - don't think about it, just relax and splosh, as much or as little as you like. {Is that window open?}


If you don't love alcohol ink, then there are many alternatives - dry brush with metallic acrylics, drop on pearlised watercolours, sweep your brillance inkpads and wax rub-ons over the surface. For a solid colour background, you would need to spread on some gesso and apply your choice of colour acrylics on top.
Out of the three 10" by 10" panels, I managed to get 12 amazing chunky backgrounds - and bits to spare too. This is the perfect project for anybody, I find it relaxing, inspiring and fun. I urge you to let go and get messy!
Let me know if you do! :)* 
10 comments:
Tanya these instructions are lovely and clear and great photos.
what a wonderfully writte tutorial. love it!
Beautiful instructions!! Thanks for showing this...I knew I was saving all these bits some reason! :D
Boy.....you have alot of cool scrappy stuff and what a wonderful way to use it..It looks amazing. Hugs, Diane
Tanya...this looks like great messy fun!!
I read this tut just before heading off to the dollar store to pick up some material for my collage class. I've got me some cheap textured bits and am going to head up to my studio now to try this out.
Wonderful tut!
I'm so glad you liked my first tut! Thankyou! :)*
Pssst! I did a page for a circle journal recently using this technique. You can see the page here.
Thanks again for posting this!
Great tutorial and I can't wait to get messy myself now! :)
Went hunting and found how you make those wonderful little scraps that you send me at times. I'm always using them. Of course if you just want to make them and keep sending them to me that's just fine.
Post a Comment